| .. | ||
| lib | ||
| led_blink.s | ||
| Makefile | ||
| README.md | ||
LED Blink Program
This is an example program to test the assembler. It blinks an LED in a Raspberry Pi 3B model.
You can find the source code in the file led_blink.s.
How to run
Run the following commands in the terminal:
$ make
You should then find the compiled binary file kernel8.img in this folder. Copy this file
along with start.elf and bootcode.bin to an SD card and insert it into the Raspberry Pi 3B model.
Connect an LED to the GPIO Pin 4 (physical pin 7) and the ground pin (physical pin 6) of the Raspberry Pi. Connect the longer leg of the LED to a 220 ohm resistor and then to the GPIO Pin 4. Connect the shorter leg of the LED to the ground pin. The following picture shows the connections:
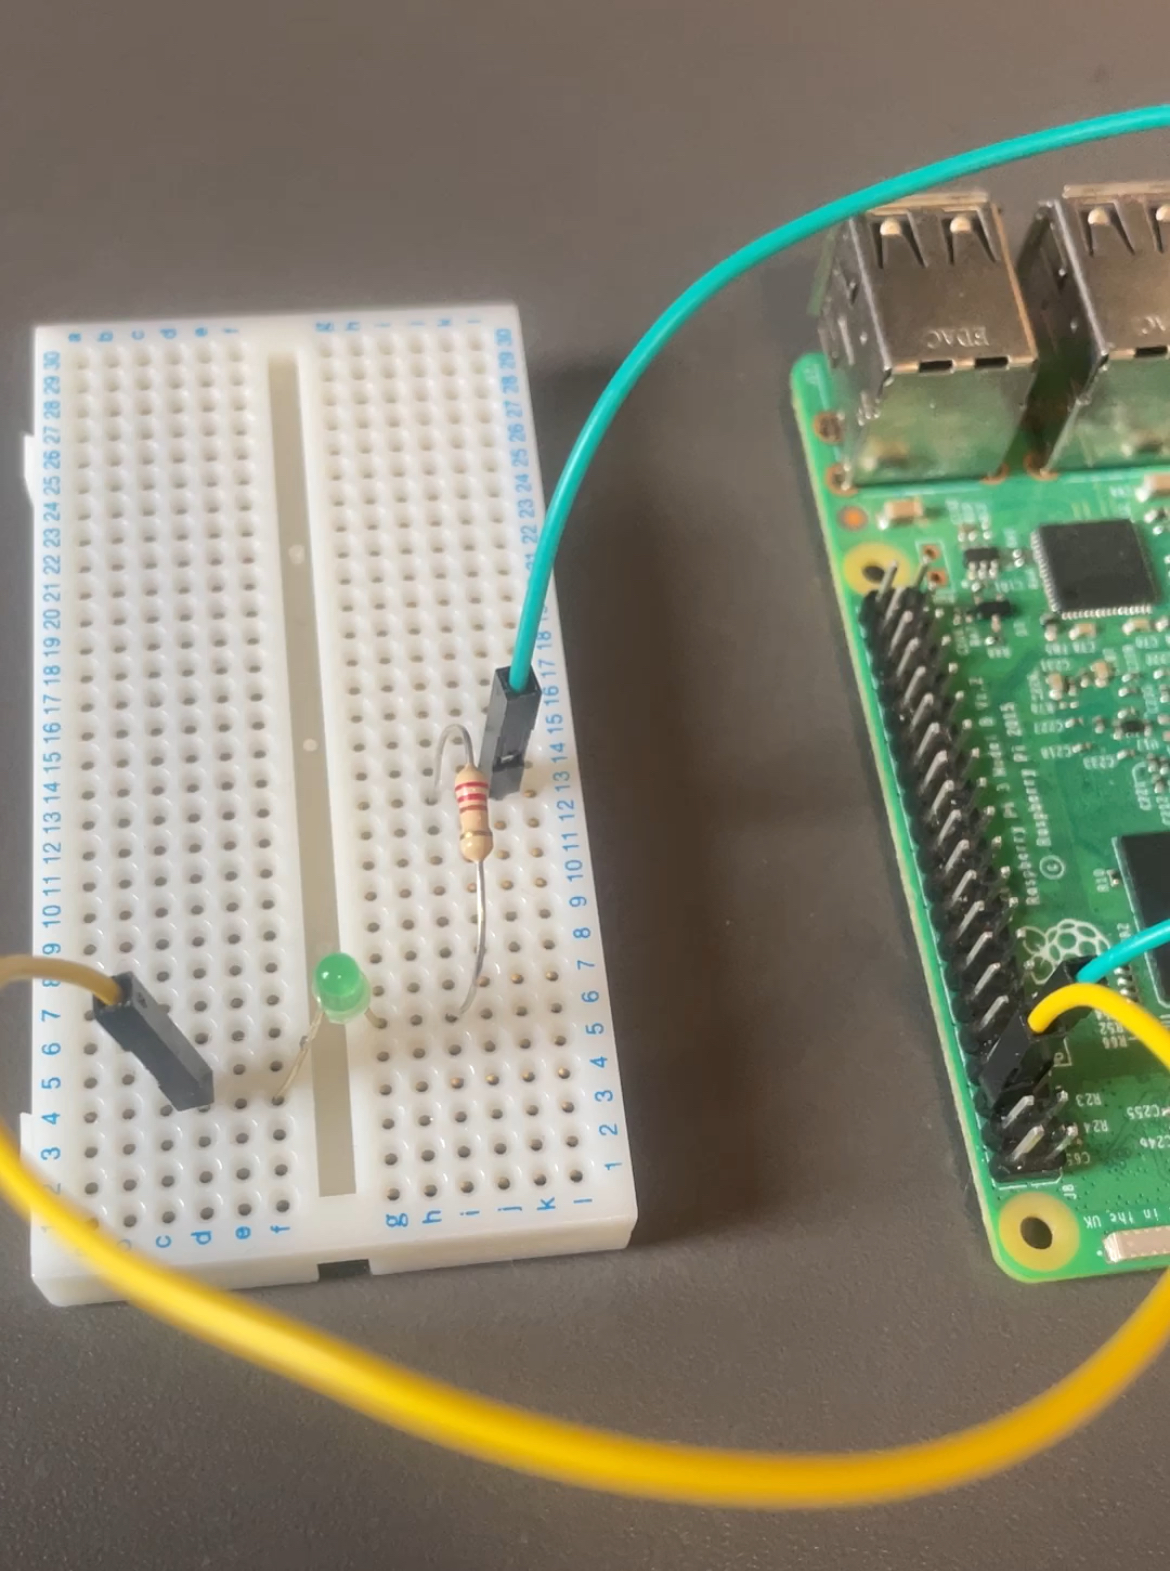
(The yellow wire is ground and the cyan wire is GPIO Pin 4)
Power on the Raspberry Pi and you should see the LED blinking, as shown in the following image:

How it works
A commented version of the source code can be found in the file lib/led_blink_commented.s.
If you want to make any changes to the program, such as changing the GPIO pin or the blinking frequency, you might find it easier to edit the commented version of the source code. Once you are done, you can run the following command:
$ make commented
This will generate the file led_blink.s with the changes you made. The program then is compiled and the file kernel8.img is generated in this folder. You can then follow the steps above to run the program in the Raspberry Pi.